Assembling the shelf system to hold almost anything.

Now that everything is cut, you can assemble this sturdy shelf sysstem which may help you out with storing items. This article is Part 3— see Part 1 in December’s issue and Part 2 in last month’s issue.
Step 1
Use a scrap 2×4 piece to mark the location of a 4-inch block (See the Photo E). The blocks will help support the shelf items’ weight with two screws and each 2×4 that rests on it will have two screws. Set these screws diagonally.
Step 2
See Photo F and on the vertical support studs mark where the top of the horizontal stud will be (3.5 inches up) and add 1/2 inch for the shelf so you know the location of the top of your shelf. With the yard stick mark the next area above for your storage boxes. Do the same for your top shelf. Add the blocks. Build all the precut vertical supports (See the article Part 2 for cutting instructions).
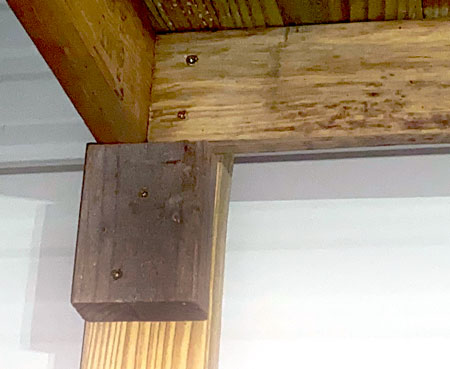
Photo E
location of a 4-inch block
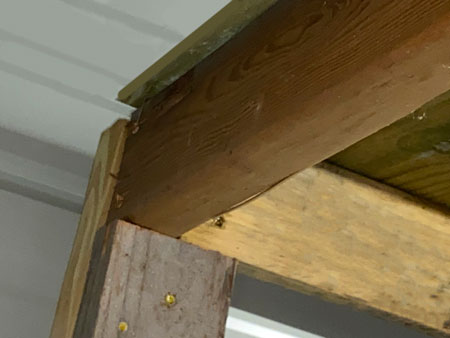
Photo G
end vertical stud
Step 3
Connect two vertical supports with a straight horizontal stud. Use the level to make sure the vertical studs are 90-degrees to the floor. Check both sides of the stud. Lean the connected vertical studs and horizontal stud against a wall and add your other verticals and horizontals.
Step 4
When you get to the end vertical studs, leave enough room for the long horizontal and the perpendicular short girder stud (See the Photo G). Once you have all the vertical, horizontal, and girder studs connected, the shelving unit should stand up. Add a cross girder near each vertical support.
Step 5
Add struts between the short girders. While these struts aren’t really needed to support the storage items. It will help support your weight when you stand on it to add the shelf planks. Position the first fencing plank slightly over the left edge of the first corner girder and nail it. Lay another fence plank against the starter plank and nail it. There will be 18 fence planks for each level.
Step 6
Use a ladder and step onto the reinforced first level shelf. Nail two starter fence planks on level two and three. Have a helper load more planks on each level as you place planks and nail them in.
Step 7
Your shelving unit is self-standing but to be safe, bolt them into a wall support. You only need two per vertical support. I predrilled a hole larger than the bolt cap so I could countersink the bolts and then used a smaller drill bit for the actual bold threaded stem.
Step 8
I began the fun task of transporting items from the storage unit.
As it turns out, I was able to give away a lot of items to Goodwill since we really weren’t using them and threw away the unusable items.


Related Articles

Differences commercial and general contractor
Discover the unique roles and responsibilities that set commercial contractors apart from general contractors in the construction industry.In the construction world, the terms 'commercial contractor' and 'general contractor' are often used interchangeably, but they...

Exploring Construction Distinctions
The construction industry is a diverse industry, including of separate residential and commercial sectors that serve as prominent pillars. Although both activities include the construction of buildings, they are carried out on very different levels and follow distinct...

Managing quality when working on build-outs and renovations
Companies expect the general contractor to renovate per the expected standards of the industry. Builders will follow the codes and standards, but these may be the minimum levels of safety, quality, and reliability. The potential contractor should include in their...